Imagine having an advanced technological solution that effortlessly regulates calcium levels in your reef aquarium.
Calcium reactors in reef tank offer precise control with minimal effort when utilized correctly. This article aims to delve into the realm of calcium reactors, emphasizing their advantages and offering practical knowledge.
Through employing these reactors, you will witness how they simplify life for your coral and marine organisms!
What is Calcium Reactor?
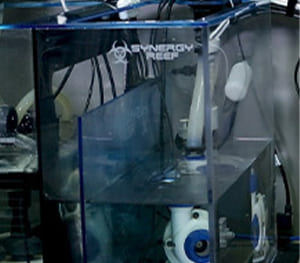
A calcium reactor is an essential tool for aquarium enthusiasts as it addresses the continuous consumption of calcium and alkalinity by corals, invertebrates, and even coralline algae. These minerals are crucial for their growth and overall well-being.
Acting as a specialized device, a calcium reactor reef tank not only supplies these vital minerals but also maintains them at stable levels throughout the day.
This stability plays a significant role in promoting the healthy growth of stony corals and other marine life within the aquarium environment. It operates by dissolving calcium carbonate using carbon dioxide to ensure a consistent supply of both calcium and alkalinity for the aquatic inhabitants.
Disclosure: This article contains affiliate links. When you follow a link to purchase the products, I sometime earn a commission, at no additional cost to you. Read my full disclosure here
Components of Calcium Reactor
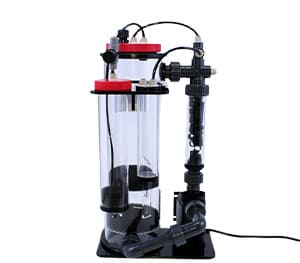
- Ca Reactor: A calcium reactor functions as a unique vessel containing material rich in calcium. Carbon dioxide is introduced into the aquarium water within this container, causing an increase in acidity. As a result, the calcareous material inside the reactor dissolves and contributes calcium and alkalinity to the aquarium water.
- Input Water Line: This is the point where we provide the calcium reactor reef tank with aquarium water.
- Dosing Pump: It functions similarly to a pump that pushes aquarium water into the calcium reactor. Various techniques can be utilized, such as employing a submersible pump, utilizing a gravity siphon, or using a continuous dosing pump. The dosing pump has the capability of both pushing water in or pulling it through based on its configuration.
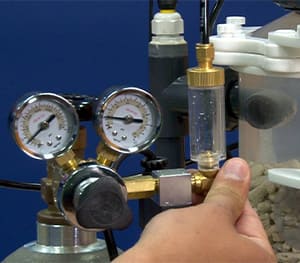
- Pressurized Cylinder: CO2 gas is kept in this pressurized cylinder and is then injected into the calcium reactor.
- C02 Regulator: The calcium reactor reef tank receives a steady supply of CO2 thanks to the CO2 regulator, which lowers the pressure of CO2 coming from the cylinder. Additionally, there is an electronic solenoid connected that uses a pH controller to assist in automatically controlling the CO2.
- CO2 Check Valve: This tiny gadget acts as a guardian. It stops water from getting inside the CO2 regulator and cylinder; it is which might harm them.
- pH Controller: According to the pH of water that’s leaving the calcium reactor, this clever controller modifies the amount of CO2. The solenoid linked to the calcium reactor regulator is used to accomplish this.
- Effluent/Output Water Line: This line returns your sump’s or aquarium’s calcium-enriched water via the calcium reactor. It functions as a means of transport for the essential ingredients your corals require to grow.
How To Setup A Calcium Reactor
Step 1: Gather all Required Equipment
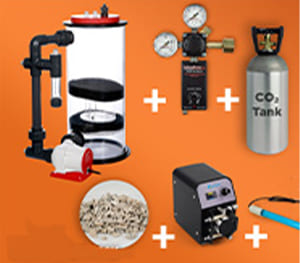
- First, gather all the necessary equipment for this calcium reactor setup process. This includes a calcium reactor, CO2 cylinder with food-grade CO2, regulator, dosing pump, pH controller, CO2 check valve, and calcium reactor media.
- Ensure that you have everything ready before proceeding to the next step.
- Next, carefully follow the manufacturer’s instructions to correctly assemble the calcium reactor.
Step 2: Fill the Reactor with Tank Water
- Utilize the dosing pump to introduce tank water into the reactor.
- Allow it to operate for 24 hours to eliminate air from the system.
- Fine-tune the flow rate in the calcium reactor setup to approximately 1-2 drops per second.
Step 3: Maintain Stable pH
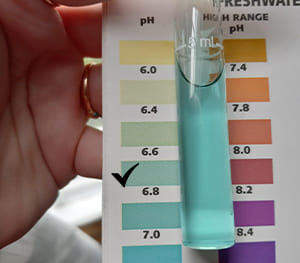
- Now, the third step for this calcium reactor setup process is to install a pH controller with a pH probe inside the reactor. The pH controller should be set to maintain a slightly acidic environment between 6.3 – 6.8 (typically around 6.5).
- Connect the CO2 regulator to the pH controller and open the CO2 cylinder to introduce carbon dioxide into the system. Adjusting the CO2 bubble count to approximately 1-2 bubbles per second can help achieve optimal stability of the pH level within acceptable ranges.
- It is crucial to monitor the calcium reactor setup closely and make necessary adjustments as needed in order to maintain consistent and reliable control over the desired acidity levels.
Step 4: Adjust Flow Rate
- Before making adjustments to the calcium reactor setup, it is advisable to assess the calcium level and alkalinity levels of your tank.
- Allow for a gradual drip from the reactor over 24 hours.
- Re-evaluate the levels on the second day.
- Should there be a decline in levels, augment the flow accordingly; if they increase, reduce it instead.
- Continue fine-tuning in this calcium reactor setup (no more than once every 24 hours) until stability is achieved consistently for at least 3-5 days. 6. The objective should be an effluent solution with an alkalinity measure ranging between 25 – 40 dKH
How Does a Calcium Reactor in Reef Tank Work?
- It begins by filling the calcium reactor reef tank with tank water.
- Activate a pump, such as the Mag 7, to ensure continuous circulation of water in the reactor.
- Gently open the needle valve on a CO2 tank to introduce a small amount of CO2 into the reactor.
- Over time, as CO2 accumulates within the calcium reactor setup, it gradually dissolves the calcium-based media contained inside the reactor.
- Utilize another pump like Maxijet to bring fresh water from your sump into the calcium reactor reef tank.
- This influx of fresh water displaces enriched liquid (known as effluent), which is expelled from at top portion of the reactor.
- The resulting effluent–rich in alkalinity and calcium compounds–trickles back into your reef tank improving your reef tank’s health.
Calcium Reactor Regulator
A calcium reactor regulator made specifically for the calcium reactors found in reef aquariums. Its main job is to keep the reactor’s pH level at the desired level.
This is how it goes:
CO2 Control: The calcium reactor regulator attaches to a CO2 cylinder and lowers the cylinder’s high pressure to a tolerable level. Additionally, a needle valve that enables precise CO2 flow rate adjustment is included.
pH Sensing: A pH probe is a common feature of a calcium reactor regulator. This probe continuously measures the pH of the reactor’s water.
pH Adjustment: The calcium reactor regulator modifies the flow of CO2 to raise or lower the acidity within the reactor based on the pH readings.
Testing Calcium Reactor Reef Tank
Troubleshooting Common Issues with Calcium Reactor Reef Tank
Low pH Issue in Tank:
The introduction of alkalinity by a calcium reactor can lead to a decrease in tank pH. Here is what you can do about it;
- Adequate surface agitation and circulation are important for eliminating excess CO2 in calcium reactor reef tank.
- Raising the pH in the calcium reactor reef tank can be achieved through the use of limewater or degassing the effluent.
Out-of-Balance Issue:
Another issue commonly faced by calcium reactor reef tank is their out-of-balance problem. Calcium reactors add both calcium and alkalinity at a fixed ratio, modifying one parameter will impact the other according to an established relationship.
- To restore balance in the calcium reactor reef tank, calcium chloride should be used for adjusting calcium levels, while sodium bicarbonate is suitable for correcting alkalinity values.
What Is The Ideal Calcium Level For Reef Tank?
To ensure ideal calcium levels reef tank, it is important to maintain a range of 380 to 450 ppm.
Additionally, achieving an alkalinity level between 8 and 12 dKH is ideal. Consistency is crucial as it helps minimize potential stress on the calcium reactor setup by minimizing fluctuations.
During the first few weeks of maintaining the ideal calcium level for reef tank, conducting daily tests can help familiarize yourself with test kits and closely monitor your tank’s parameters.
It is advisable to keep records of these daily tests for future reference. Once you have established an ideal calcium level for reef tank, daily testing may no longer be necessary and can be done every week or as needed.
Advantages and Disadvantages of Calcium Reactor
Conclusion
If you have been utilizing dosing systems to regulate the calcium reactor reef tank, it is possible that you are aware of calcium reactors but may not completely understand their proper usage and timing.
Calcium reactors present a more streamlined approach to preserving these levels. By implementing these suggestions, you can enhance your reef-keeping journey and enjoy the flourishing state of your aquarium.